How to Save Images Without Losing Quality

If you want to save images without losing quality, the first thing to know is that your software is usually the culprit. You export an image, open the file, and it looks softer or blurrier than the original, whether you pulled it from a Word doc, saved a slide from PowerPoint, or exported it from Photoshop. Most apps quietly compress or shrink the image when you save, and that's where the detail disappears.
The good news is that it's an easy fix once you know what to do, and the steps depend on where your image is coming from. This guide is split by source, so find your situation below, Word, PowerPoint, PDF, Photoshop, a RAW photo, or a web page, and follow the steps to keep every bit of quality.
Let's start with why this happens, so the fixes make sense.
How to Save an Image From Word Without Losing Quality
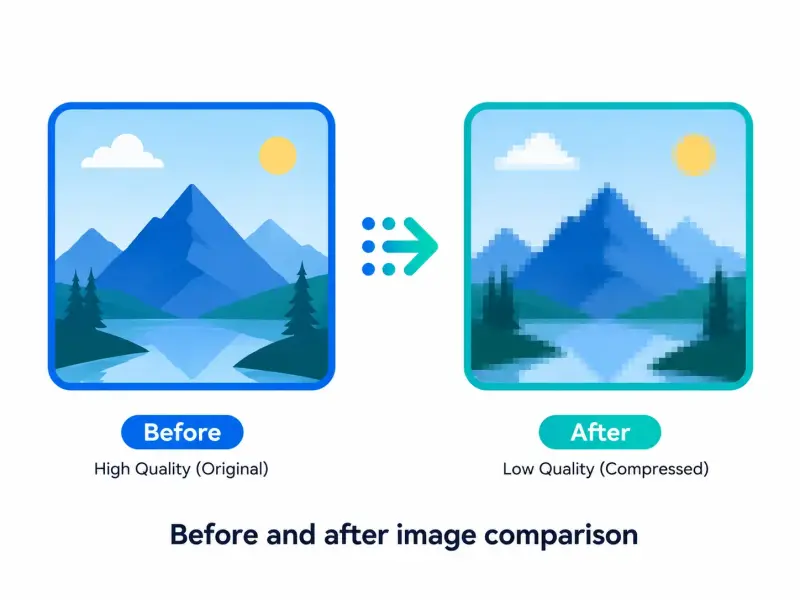
If you right-click a picture in Word and choose "Save as Picture," you'll often get a compressed copy, because Word shrinks images when you insert them. Here are two ways to save an image from Word without losing quality and get the real, full-size file.
Method 1: Change the file extension to .zip (most reliable)
A Word .docx file is actually a zip folder in disguise, and your original images are stored inside it untouched.
Make a copy of your Word file so you don't damage the original.
Rename the copy's extension from
.docxto.zip.Open the zip and go to the
wordfolder, thenmedia.Inside you'll find every image at its original quality. Copy them out.
This works because it pulls the files Word stored on insert, before any compression is applied on export.
Method 2: Save the document as a web page
Open your document and go to File → Save As.
Choose Web Page (.htm) as the file type and save.
Word creates a folder next to the file with a
_filesending.Open that folder. All your images are saved there as separate files.
Bonus: Stop Word from compressing images in the first place
If you're the one building the document, turn off compression before you insert pictures:
Go to File → Options → Advanced.
Scroll to Image Size and Quality.
Tick Do not compress images in file, and set default resolution to High fidelity.
Do this and Word keeps your images at full quality from the start.
How to Save an Image From PowerPoint Without Losing Quality
PowerPoint searches usually mean one of two things: you want to pull a picture out of a slide, or you want to save a whole slide as an image. Here's how to do both without losing quality.
Save a picture from a slide
The same zip trick from Word works here, and it gives you the original files:
Make a copy of your
.pptxfile.Rename the copy's extension to
.zip.Open it and go to the
pptfolder, thenmedia.All the images from your slides are there at full quality. Copy them out.
You can also right-click a picture and choose Save as Picture, but the zip method is safer if PowerPoint compressed the image when it was added.
Save a whole slide as an image (the high-resolution way)
If you export a slide as a PNG normally, PowerPoint saves it at a low resolution (around 96 DPI), which looks blurry when you zoom in. To get a sharp, high-resolution slide:
Close PowerPoint first.
Open the Registry Editor (press
Windows + R, typeregedit, hit Enter).Go to the PowerPoint Options key for your version (for example,
HKEY_CURRENT_USER\Software\Microsoft\Office\16.0\PowerPoint\Options).Create a new DWORD value named
ExportBitmapResolution.Set its value to 300 (decimal) for 300 DPI.
Reopen PowerPoint, then go to File → Save As, choose PNG, and export the slide.
Now your slide saves at full, print-ready quality. PNG is the better pick here because it keeps text and edges crisp, unlike JPG.
How to Save a PDF as an Image Without Losing Quality
PDF searches split into two needs: saving a PDF page as a sharp image, and exporting a Word file to PDF without the pictures going blurry. Here's how to handle both.
Save a PDF page as a high-quality image
The key is exporting at a high DPI. Anything below 150 DPI will look soft, so aim for 300.
Open your PDF in a tool that lets you set image resolution (Adobe Acrobat, or a good free PDF converter).
Choose Export To → Image, then pick PNG (sharper for text) or JPG (smaller for photos).
Set the resolution to 300 DPI before exporting.
Save, and your page comes out crisp instead of pixelated.
PNG is the safer choice if your PDF has text or diagrams, since it keeps edges clean.
Save a Word file as PDF without losing image quality
When you export Word to PDF, the "Minimum size" option crushes your images. Use the standard setting instead:
In Word, first turn off image compression: File → Options → Advanced → Image Size and Quality → Do not compress images in file.
Go to File → Export → Create PDF/XPS.
In the save window, choose Standard (publishing online and printing), not "Minimum size."
Save. Your PDF keeps the images at full resolution.
On older versions like Word 2007, look for the Optimize for: Standard option in the same save dialog.
For a deeper look at which format holds up best, see our guide on JPG vs PNG vs WEBP.
How to Save a Photoshop Image Without Losing Quality
Photoshop gives you a lot of save options, and the wrong one quietly drops quality. Here's how to export from Photoshop and keep your image looking exactly like it does on the canvas.
Always keep a master PSD
Before exporting anything, save your working file as a .psd (File → Save). PSD is fully lossless and keeps your layers, so you always have a perfect original to re-export from later. Treat this as your master copy.
Export at full quality
For the final image, use Export As instead of a quick save:
Go to File → Export → Export As.
For graphics, logos, or anything with text, choose PNG. It's lossless and keeps edges sharp.
For photos, choose JPG and drag the Quality slider to 100%.
Leave the image size at 100%, don't scale it down unless you actually need a smaller file.
Click Export.
Set the right resolution for print
If the image is going to be printed, check Image → Image Size and set the resolution to 300 PPI before exporting. Screen-only images are fine at 72 PPI.
One habit to avoid
Don't keep re-saving the same JPG over and over. Each save compresses it again and slowly destroys detail. Always go back to your PSD master and export a fresh copy instead.
How to Save RAW Images to JPG Without Losing Quality
A RAW file holds all the data straight from your camera's sensor, while JPG is a compressed format, so some loss is built in. The goal here is to lose as little as possible. With the right export settings, the difference is invisible to the eye.
Edit your RAW file first in something like Lightroom or Camera Raw. Do all your adjustments while it's still RAW, since that's where you have the most quality to work with.
When you're ready, choose Export (or File → Save As) and pick JPG.
Set the Quality to 100 (or maximum). This is the single most important setting.
Keep the dimensions at full size, don't resize down unless you need a smaller file.
Set the color space to sRGB so the colors look right everywhere.
Export, and always keep your original RAW file as a backup.
Since you still have the RAW, you can re-export a fresh JPG anytime without any quality loss stacking up.
How to Save Images From a Website Without Losing Quality
Saving an image from a web page sounds simple, but the copy you get is often smaller and more compressed than the real thing. That's because most sites show you a lightweight preview to load the page faster, while the full-size file sits in the background.
If you want to save an image from your browser without losing quality, you need to reach that original file. An HD image downloader does this for you by picking the largest version the site lists.
Get the original, not the preview
The quickest manual trick:
Right-click the image and choose Open image in new tab.
Look at the new tab. This is usually the full-size version.
Right-click again and select Save image as.
Sometimes that still gives you a resized copy, though, especially on image-heavy sites that serve different sizes for different screens.
Pull the full-resolution file directly
When the manual way falls short, or when a page has dozens of images, a dedicated extractor is faster and more reliable. It reads the page and pulls the actual source files instead of the previews you see on screen.
To grab every image on a page at once, scans the whole page and hands you all the full-size files in one go.
If you just need the direct link to an image, the gives you the clean source URL.
Not sure how to find that link yourself? This walks you through it.
Because these pull the source file, you skip the compressed preview and keep the image at its original quality. For more on tricky pages where right-click is blocked, see how to save an image from a URL.
Which Format Keeps the Most Quality: JPG or PNG?
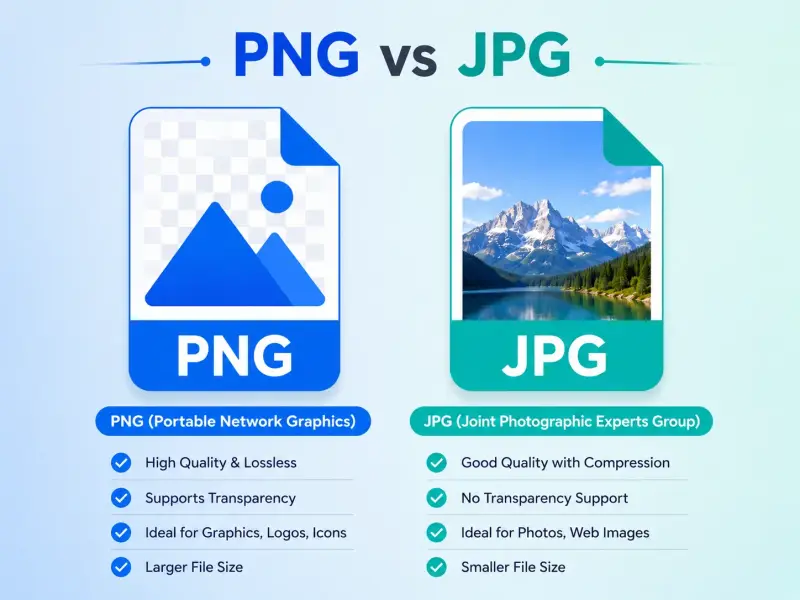
The format you save in matters just as much as the settings. Pick the wrong one and even a careful export can look off.
PNG is lossless, so it never drops quality no matter how many times you save. Use it for logos, screenshots, diagrams, and anything with text or sharp edges.
JPG is lossy, but at high quality it's nearly perfect for photos, and the files are far smaller. Use it for photographs and detailed images where a small size helps.
A simple rule covers most cases: photos go to JPG, everything else to PNG. There's also a newer format, WEBP, that often beats both on size, and you can compare all three in JPG vs PNG vs WEBP.
Keep a master before making delivery copies
The safest quality workflow has one untouched master and separate exports for email, web, documents, and print. Do not repeatedly open and save the same lossy file. Each new encode can remove more detail, even when the dimensions stay the same.
When an image comes from Word, PowerPoint, or a PDF, compare the extracted file's pixel dimensions with the placed version. The document may contain a better source than the preview shown on screen.
Related ExtractPics guides
- Why Downloaded Images Look Blurry and How to Fix It
- How to Compress Images Without Losing Quality
- How to Resize an Image
- Image File Formats Explained
Sources and verification
This article was reviewed against the following primary documentation and standards in August 2026:
- Microsoft Support: turn off picture compression
- Adobe Acrobat: export PDFs to other formats
- MDN: image file type and format guide
Protect the best copy first
Find or extract the highest-quality source, save it as the master, and make smaller copies from that file. Turn off document compression when the software permits it. Pick the format according to the content, not habit. If the only copy is already small or heavily compressed, changing formats will not bring the missing detail back.
