How to Convert PNG to JPG (and JPG to PNG)
Convert PNG to JPG or JPG to PNG in seconds using Paint, Preview, or free online tools. Plus how to keep transparency and quality intact.

list On this page expand_more
You can convert PNG to JPG (or JPG to PNG) in a few seconds, without installing anything. Your computer already does it, and plenty of free websites do too.
Before you start, pick the right format for the job. JPG files are smaller and best for photos, which is why most websites and upload forms ask for them. PNG files are larger but keep transparent backgrounds and sharp edges, so they suit logos, icons, and screenshots. Not sure which one you need? Our guide on JPG vs PNG vs WebP explains it.
Just remember that converting a PNG to JPG removes transparency and fills the background with solid white. The steps below cover both directions, plus how to keep the quality high.
How to Convert PNG to JPG
There are three easy ways to do this. Pick the one that fits what you're on.
On Windows with Paint:

Right-click your PNG file and choose Open with > Paint.
Click File > Save as.
Pick JPEG picture.
Name the file and hit Save.
Paint comes with every Windows PC, so there's nothing to download.
On Mac with Preview:
Double-click the PNG to open it in Preview.
Go to File > Export.
In the Format dropdown, choose JPEG.
Set the Quality slider near the top, then click Save.
Online from any device
If you're on a phone or want to do several at once, use a free site like iLoveIMG or CloudConvert. Upload the PNG, pick JPG as the output, and download. No account needed.
Remember that JPG can't store transparency. If your PNG has a see-through background, JPG fills it with white. More on that below.
How to Convert JPG to PNG
The steps are almost the same, you just pick PNG as the output instead of JPG.
On Windows with Paint
Right-click your JPG and choose Open with > Paint.
Click File > Save as.
Pick PNG picture.
Name the file and click Save.
On Mac with Preview
Open the JPG in Preview.
Go to File > Export.
Choose PNG in the Format dropdown.
Click Save.
Online from any device
Upload the JPG to iLoveIMG or CloudConvert, set the output to PNG, and download.
One point worth knowing. Converting a JPG to PNG won't make it better quality. JPG already threw away some data when it was first saved, and PNG can't bring that back. What you get is a larger file with the same quality as the JPG you started with. The main reason to convert this way is if you need a lossless copy for editing, or a format that supports transparency you plan to add later.
The Transparency Catch (PNG to JPG)
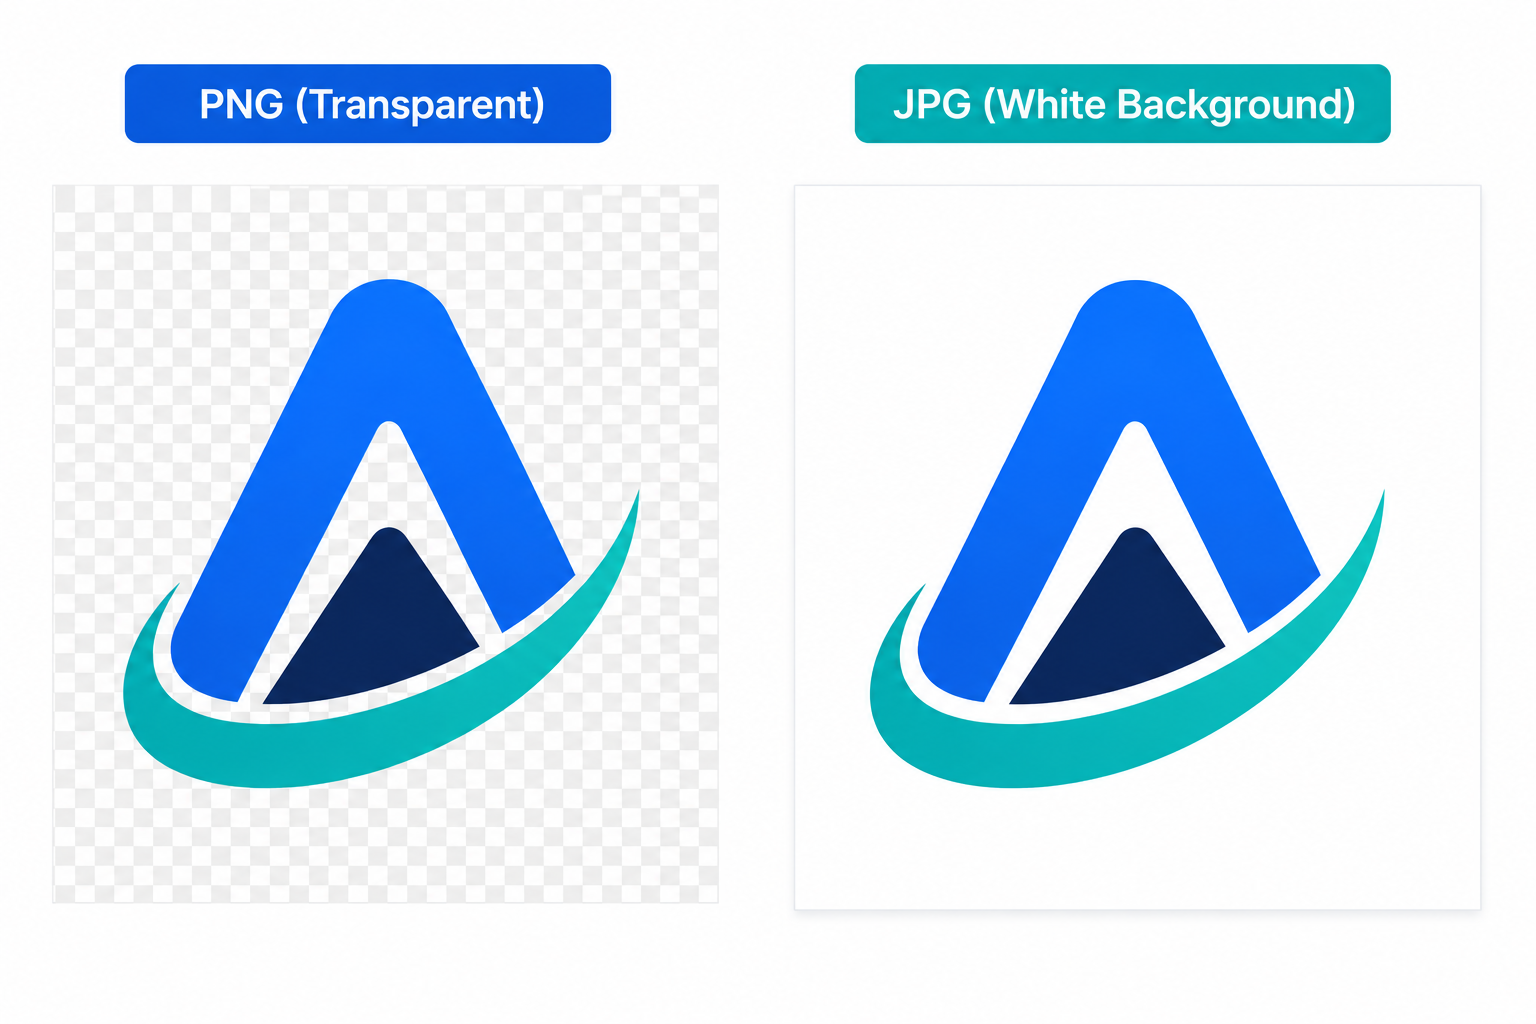
This is the part that catches most people. A PNG can have a transparent background, but JPG cannot. So when you convert a PNG to JPG, that see-through area has to become a real color, and most tools fill it with white.
For a logo or icon you planned to place on a colored background, this is a problem. You end up with an ugly white box around it.
Here's how to handle it.
If you need transparency, stay with PNG. There's no way around this. JPG simply doesn't support a transparent background, so converting will always flatten it. Keep the file as PNG, or use WebP, which is small like JPG but still supports transparency.
If white is fine, convert away. For photos and most screenshots there's no transparency to lose, so you won't see any difference.
If you want a different background color, open the PNG in an editor like Photopea (free, runs in your browser) first. Add a new layer below your image, fill it with the color you want, flatten the image, then export as JPG. Now the background matches instead of defaulting to white.
Going the other way, from JPG to PNG, does not add transparency. The background stays exactly as it looks. To make an area transparent you have to erase it manually in an editor.
How to Convert Without Losing Quality
The conversion itself is where quality can slip, mostly when you go to JPG. Here's how to keep your images sharp.
Going to JPG, set the quality high. JPG uses lossy compression, so the quality depends on the setting you choose. In Mac Preview, drag the Quality slider near the top before saving. On most online converters, look for a quality option and keep it at 90 or above. This gives you a small file that still looks clean.
Going to PNG, quality is never the issue. PNG is lossless, so it keeps every pixel. The only downside is a bigger file. If size matters more than perfect detail, JPG or WebP is the smarter pick.
Converting to a target size like 100KB. Some forms cap the file at 100KB or 200KB. If your JPG comes out too large, don't just crank the quality down, because that makes it blurry. Resize the image smaller first, say to around 1200px wide, then lower the quality a little. You hit the limit while keeping it sharp. Our guide on compressing images without losing quality goes deeper on this.
Conclusion
JPG is for photos. PNG is for logos and anything with a transparent background.
To convert, open the image in Paint on Windows or Preview on Mac, then save it in the other format. On a phone, a free site like iLoveIMG does the job.
Just remember, a PNG with a transparent background turns white when you save it as JPG. So if you need that background, keep the file as PNG.